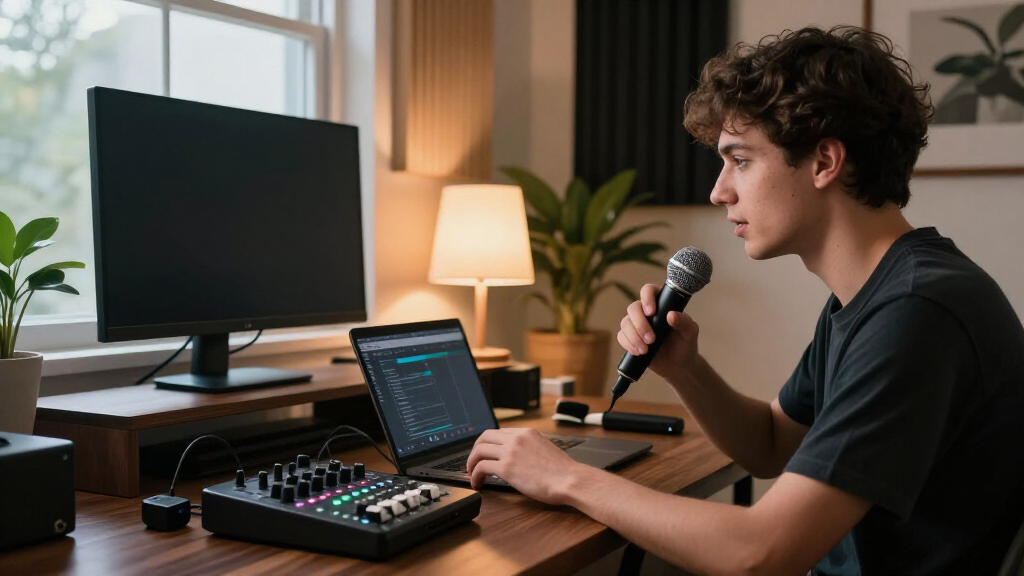
Set up a wireless microphone, connect its receiver to your streaming computer or console, and check that your stream captures clear speech without dropouts. This guide is for beginner streamers using a wireless system with a separate transmitter and receiver. Allow 20–40 minutes, including an audio test.

Get audio and creator gear delivered free with Prime
- Fast, free delivery on millions of items
- Prime Video, Amazon Music and more included
- Member-only deals all year

DJI Mic Mini Wireless Microphone System with 2 Transmitters, Receiver, and Charging Case
- ✔ Transmitter weight: 10 g
- ✔ Maximum transmission range: 400 m
- ✔ Sampling rate: 48 kHz
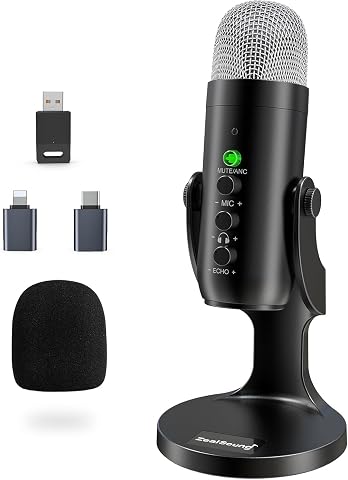
ZealSound K66 Wireless USB Microphone with Noise Reduction for PC, iPhone, iPad, and Android
- ✔ Model: K66
- ✔ Microphone type: Condenser
- ✔ Audio capture: 48 kHz

DJI Mic Mini Wireless Microphone System (2 Transmitters + 1 Mobile Receiver)
- ✔ Transmitter weight: 10 g each
- ✔ Transmission range: Up to 300 m
- ✔ Battery life: Up to 11.5 hours
Difficulty: Beginner | Time: 20–40 minutes
What You’ll Need
Tools & Materials:
- Wireless microphone system with transmitter and receiver
- Computer or streaming console with a compatible audio input
- USB cable or audio cable compatible with the receiver and device
- Streaming software, such as OBS Studio
- Headphones for monitoring
- Charged batteries or a charging cable
Knowledge:
- Basic ability to open audio settings in your operating system and streaming software
- Ability to identify the receiver’s audio output and your device’s available input
Check the microphone system’s manual for supported connections and pairing instructions. Some receivers connect by USB, while others use a 3.5 mm or ¼-inch audio output. A camera-oriented 3.5 mm cable may not work as a computer input cable. Charge the transmitter and receiver before setup, and keep the manual available.
DJI Mic Mini Wireless Microphone System with 2 Transmitters, Receiver, and Charging Case
For creators who need speakers to move freely, this is the most flexible kit in the lineup. Its two 10 g transmitters let two people wear microphones rather than sharing a stationary pickup, and the receiver makes it a fuller recording setup than the K66’s single USB condenser format. That distinction matters for interviews, co-hosted streams, or demonstrations where a speaker steps away from the desk.The charging case is the bundle’s clearest advantage: DJI lists up to 48 hours of battery life with the case, alongside a maximum 400 m transmission range. Those figures make it a practical choice for frequent sessions, though the range is a maximum and can vary with conditions. Two noise cancellation levels and automatic limiting add useful safeguards, but strong cancellation is not automatically best for every voice or room. Compared with the mobile-receiver DJI kit, this version emphasizes charging and included receiver flexibility; compared with the K66, it trades immediate on-mic controls for wearable freedom.
Pros:
- Two lightweight transmitters support two-speaker streams.
- Charging case provides up to 48 hours of stated battery life.
- Two noise cancellation levels adapt to different surroundings.
- Automatic limiting helps guard against audio clipping.
Cons:
- The 400 m maximum range depends on recording conditions.
- Strong noise cancellation may not suit every room or voice.
Best for: Streamers who host interviews or co-hosted sessions, move around on camera, and want two transmitters with a charging case.
Not ideal for: Desk-only streamers who want physical gain and mute controls directly on a USB microphone.
Bottom line: We rank this first for its two-speaker flexibility and charging case, provided your stream benefits from wearable microphones rather than desk controls.
“We rank this first for its two-speaker flexibility and charging case, provided your stream benefits from wearable microphones rather than desk controls.”
ZealSound K66 Wireless USB Microphone with Noise Reduction for PC, iPhone, iPad, and Android
The K66 is the most desk-oriented choice here. Its cardioid condenser pickup is designed to focus on a nearby voice, while the mic itself provides gain, headphone volume, echo, and mute controls. That setup can make common adjustments easy to reach during a stream. The zero-latency headphone monitoring jack also lets a host listen to the microphone signal while speaking, a useful distinction from the two DJI kits’ wearable-transmitter approach.Its USB receiver, included adapters, and wired USB backup mode give it more connection options for compatible computers, phones, and tablets. That flexibility comes with a compatibility caveat: device support depends on the connection and adapter working with the particular setup. The on-mic noise reduction mode is described as helping with common background sounds, not removing every distraction. Unlike either DJI option, the K66 is a single microphone rather than a two-transmitter system, so it makes more sense for a solo host who stays near the desk than for a moving interview or two-person stream.
Pros:
- On-mic gain, echo, and mute controls are convenient during broadcasts.
- Zero-latency monitoring is available through a 3.5 mm headphone jack.
- Wireless and wired USB modes offer a fallback option.
- Adapters support a range of compatible computer and mobile connections.
Cons:
- Device compatibility depends on supported connections and adapters.
- Noise reduction is intended to reduce common sounds, not eliminate all background noise.
Best for: Solo streamers who broadcast from a desk and want accessible mic controls, headphone monitoring, and wired fallback.
Not ideal for: Hosts who need two wearable microphones or expect to move around while streaming.
Bottom line: We recommend the K66 for a stationary solo stream where direct controls and monitoring matter more than wearable, two-person capture.
“We recommend the K66 for a stationary solo stream where direct controls and monitoring matter more than wearable, two-person capture.”
DJI Mic Mini Wireless Microphone System (2 Transmitters + 1 Mobile Receiver)
This DJI bundle keeps the two-transmitter concept but pairs it with a USB-C mobile receiver. That makes it the more focused choice for creators who stream or record on compatible phones and tablets, especially when a compact kit matters. With two 10 g transmitters, it can capture a host and guest without asking them to stay close to one shared microphone. Its listed compatibility also includes PCs and DJI Osmo devices, though the USB-C receiver makes checking your device and workflow worthwhile.The kit lists a 300 m maximum transmission range and up to 11.5 hours of battery life. Those figures are useful context, but the charging-case DJI bundle lists a longer battery total with its case and a higher maximum range. As a result, this mobile-receiver version is easier to justify for a streamlined phone workflow than for buyers prioritizing maximum listed endurance. Both DJI kits have two noise cancellation levels; this one also carries practical caveats around magnets, water exposure, and performance in extreme temperatures. Compared with the K66, it supports movement and two speakers, while giving up the K66’s on-mic gain and headphone controls.
Pros:
- Two 10 g transmitters are lightweight and discreet.
- USB-C receiver supports listed compatible mobile devices and PCs.
- Two noise cancellation levels offer options for different surroundings.
- Two transmitters suit interviews and co-hosted mobile streams.
Cons:
- Its listed 11.5-hour battery life is shorter than the case-based total of the other DJI bundle.
- The system is not waterproof.
- Magnets may interfere with some medical devices or storage media.
Best for: Mobile-first creators who want two discreet transmitters and a USB-C receiver for compatible phones, tablets, or devices in the listed ecosystem.
Not ideal for: Streamers who need a charging case, the longest stated battery life, or a desk mic with direct controls.
Bottom line: We favor this bundle for compact USB-C mobile streaming, while the charging-case DJI kit is the stronger fit when extended sessions are the priority.
“We favor this bundle for compact USB-C mobile streaming, while the charging-case DJI kit is the stronger fit when extended sessions are the priority.”
As an Amazon Associate we earn from qualifying purchases.
Before You Start
Place the receiver where it has a clear path to the transmitter, away from routers, metal surfaces, and crowded USB hubs when possible. Turn off or mute speakers during testing to prevent feedback. If you stream from a console, check whether it accepts the receiver’s connection and whether the streaming setup routes console audio separately from microphone audio.
Step-by-Step Instructions
Step 1: Charge and pair the microphone
Charge the transmitter and receiver, then switch both on. Follow the system’s pairing instructions; many models pair automatically, while others require pressing a link or pair button. Select the same channel or frequency on both units if the system asks you to do so.
Tip:Keep the transmitter and receiver close together during pairing. If you use a system with selectable frequencies, choose a clear channel according to its display or companion app.
Check: The receiver shows a connection indicator, and speaking into the microphone produces an audio or level indication on the receiver.
Step 2: Attach and position the microphone
Clip the lavalier microphone to your clothing or attach the headset microphone as directed by its manufacturer. Position the capsule near your mouth, usually around 15–20 cm away, and keep it clear of fabric that may rub against it. If you use a handheld transmitter, hold it steadily near your mouth without covering its antenna.
Tip:Wear the transmitter securely and route its cable so it does not pull on the microphone. Avoid placing the capsule directly under a collar or scarf.
Check: Your voice sounds present when monitored, with no obvious rubbing, tapping, or clothing noise.
Step 3: Connect the receiver to your streaming device
Connect the receiver to a compatible audio input on your computer or console. Use USB if the receiver supports it and your device recognizes it as an audio input. Otherwise, connect the receiver’s audio output to the device’s microphone or line input with the correct cable. Follow the receiver manual if it requires a particular output level or cable type.
Tip:Do not assume that every 3.5 mm input accepts microphone-level audio. If your computer lacks a compatible input, use an audio interface or USB adapter that supports the receiver’s output.
Check: Your operating system or console lists the receiver or connected interface as an available audio input.
Step 4: Select the microphone in your device settings
Open your computer’s sound settings and set the receiver or audio interface as the input device. If you use a console, open its audio or accessory settings and select the compatible microphone input. Speak at your usual streaming volume and watch the input meter.
Tip:If the device offers input modes such as microphone and line, choose the mode recommended by the receiver or interface manual. An incorrect mode can make the signal too quiet or distorted.
Check: The input meter moves when you speak and remains still when you are quiet.
Step 5: Configure the input in streaming software
Open your streaming software’s audio settings and select the receiver or interface for the microphone input. If the software uses audio sources, add an audio input capture source and choose that same device. Disable or mute any duplicate microphone source so your voice does not sound doubled or echoing.
Tip:Keep the operating system and streaming software input selections consistent. A meter moving in one place does not confirm that the stream is using that device.
Check: The microphone meter in your streaming software responds to your speech.
Step 6: Set a clean speaking level
Speak at your normal streaming volume and adjust the receiver output or software input gain until the meter reaches a healthy level without hitting its maximum. In OBS Studio, aim for typical speech peaks around −12 to −6 dB. Make a short recording or private test stream, then listen with headphones.
Tip:Raise the microphone gain gradually. Excessive gain can make room noise louder and cause clipping. If the signal is already distorted at a low software level, lower the receiver output or check its input mode.
Check: Your voice is clear, has a steady volume, and does not crackle or sound clipped in the recording.
Step 7: Test wireless range and stream routing
Start a private test recording or stream. Speak while sitting in your usual streaming position, then move through the area where you might use the microphone. Watch the receiver’s signal indicator and listen to the recording. Confirm that the microphone is on the correct streaming track or broadcast mix.
Tip:Keep the receiver in its intended position during the range test. If you stream from a fixed desk, test from the farthest position you expect to use.
Check: The recording contains your voice throughout the test, with no dropouts, unexpected silence, or duplicate audio.
Common Mistakes to Avoid
- Selecting the computer’s built-in microphone instead of the wireless receiver. — Check the selected input in both device settings and streaming software, then confirm that each input meter responds to the wireless microphone.
- Setting gain too high, causing clipping or loud room noise. — Speak at normal volume, raise gain gradually, and keep speech peaks below the meter’s maximum.
- Placing the microphone where clothing rubs against it. — Secure the capsule near your mouth and test for fabric noise before going live.
- Using an incompatible cable or input mode. — Match the receiver output to the device input and follow the receiver or interface manual for cable type and microphone or line settings.
Troubleshooting
Problem: The receiver does not show a connection to the transmitter.
Solution: Charge both units, bring them close together, and repeat the pairing procedure. Check that both are on the same channel or frequency and that the transmitter is not muted.
Problem: The device or streaming software shows no microphone signal.
Solution: Confirm the cable is connected to the receiver’s audio output and the device’s audio input. Select the receiver or interface in both device settings and streaming software. If using USB, try a direct port and check whether the device appears as an input.
Problem: The audio is very quiet or distorted.
Solution: Check whether the input is set to microphone or line as recommended by the equipment manual. Adjust receiver output and software gain in small increments, then record another test.
Problem: The recording has dropouts, hiss, or interference.
Solution: Move the receiver closer to the transmitter and away from routers, metal objects, and crowded USB hubs. Try a different channel if the system allows it, then repeat the range test.
What Success Looks Like
Your streaming software receives the wireless microphone as its selected input. A test recording captures speech at a steady level without clipping, fabric noise, echo, or wireless dropouts. The receiver maintains its connection from your normal streaming position, and the recording contains the microphone on the intended track or broadcast mix.
Next Steps
Before each stream, check the battery level, confirm the transmitter is unmuted, and make a brief audio test. Store the microphone and receiver safely after use, and charge them before the next session. If you change computers, cables, channels, or streaming software, repeat the input and recording checks.
Frequently Asked Questions
Can I connect a wireless microphone directly to my computer?
Yes, if the receiver supports a computer-compatible USB connection or your computer has an audio input that matches the receiver’s output. Otherwise, connect it through a compatible audio interface or USB adapter.
Should I use USB or a 3.5 mm connection?
Use a connection supported by both the receiver and your streaming device. USB can appear as a dedicated audio input; an analog connection may need an interface or a correctly wired cable. Follow the equipment manuals.
How far can I move from the receiver?
The usable range depends on the microphone system, obstacles, and radio interference. Check the manufacturer’s range guidance and test from the farthest position you plan to use.
Why does my voice sound doubled or echoing?
Your software may be capturing the wireless microphone and another microphone at the same time, or monitoring may be routed back into the stream. Mute duplicate input sources and check the software’s monitoring and audio routing settings.
Halloween Picks
halloween
As an affiliate, we earn on qualifying purchases.