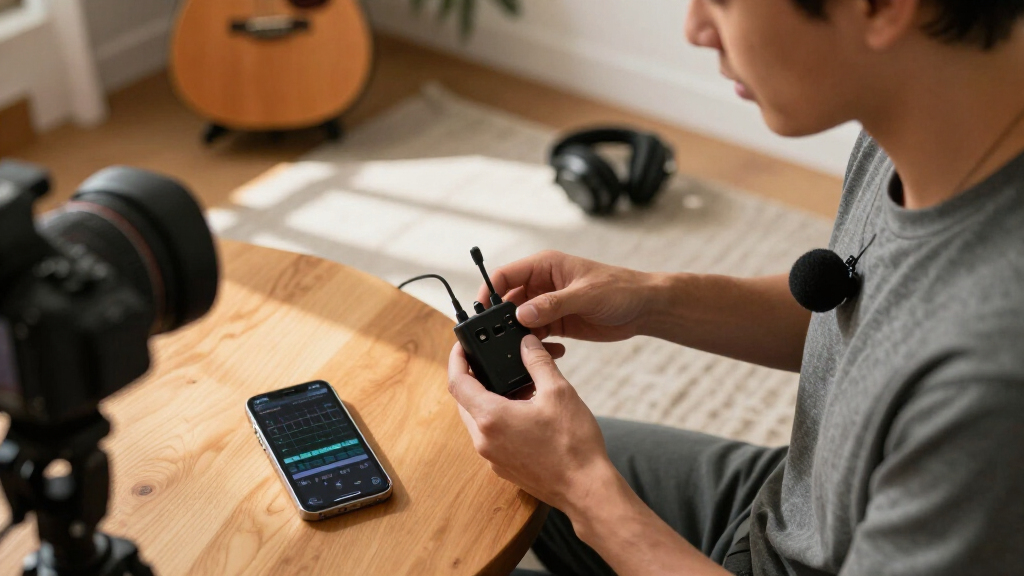

This guide walks you through setting up a wireless microphone system and recording clean, usable audio for videos, podcasts, vlogs, or live streams. You will unbox and charge your equipment, pair the transmitter and receiver, connect the receiver to your camera, phone, or computer, set correct audio levels, and run a test recording that confirms everything works before you shoot real content. By the end, you will have a working wireless audio setup and a repeatable pre-recording routine.

Get audio and creator gear delivered free with Prime
- Fast, free delivery on millions of items
- Prime Video, Amazon Music and more included
- Member-only deals all year

DJI Mic Mini Wireless Microphone System with 2 Transmitters, 1 Receiver, and Charging Case
- ✔ Transmitters: 2
- ✔ Receiver: 1
- ✔ Transmitter weight: 10 g

Mini Mic Pro Wireless Lavalier Microphone for iPhone and Android
- ✔ Connectivity: Wireless, plug-and-play; no app or Bluetooth required
- ✔ Compatibility: iPhone, Android, tablets, and laptops
- ✔ Included adapters: USB-C and Lightning

DJI Mic Mini Wireless Microphone Kit (2 Transmitters, Mobile Receiver)
- ✔ Transmitters: 2
- ✔ Transmitter weight: 10 g
- ✔ Receiver: 1 mobile USB-C receiver
This guide is written for beginner and intermediate creators using consumer wireless mic systems — clip-on lavalier kits with a small transmitter and receiver (such as DJI Mic, Rode Wireless GO, Hollyland Lark, or similar 2.4 GHz systems). It also covers phone-friendly wireless mics that plug directly into USB-C or Lightning ports. No prior audio engineering knowledge is required. Expect the full setup and testing process to take 30 to 60 minutes the first time; after that, your pre-shoot routine should take under five minutes.
Difficulty: Beginner | Time: 30-60 minutes (including a test recording)
What You’ll Need
Tools & Materials:
- A wireless microphone system (transmitter, receiver, charging case or cables)
- A recording device: camera, smartphone, or computer
- The correct cable or adapter to connect the receiver to your device (3.5mm TRS, USB-C, Lightning, or full-size camera output)
- A windscreen or foam cover for outdoor recording
- Fresh batteries or a fully charged power source
- Headphones for monitoring audio
Knowledge:
- Basic operation of your camera or phone, including how to start a video recording
- How to navigate your device’s settings menu
- Familiarity with playback and file review on your recording device
Before starting, check which input your recording device actually has. Many modern phones have no headphone jack and may need a USB-C or Lightning receiver, while cameras usually take a 3.5mm TRS plug. Buying or locating the right cable in advance prevents the most common setup failure. Also confirm that your wireless system operates on the 2.4 GHz band, which is legal and license-free in nearly all countries.
DJI Mic Mini Wireless Microphone System with 2 Transmitters, 1 Receiver, and Charging Case
For creators who regularly record interviews, livestreams, or conversations, this is the most complete option in the group. The kit includes two lightweight transmitters, a receiver, and a charging case, so we can mic two speakers and carry a system designed around repeated use. Its stated battery life reaches up to 48 hours with the charging case, a substantial advantage over the Mini Mic Pro’s up to six hours per charge and the mobile-receiver kit’s up to 11.5 hours of operating time.The two noise-cancellation levels and automatic volume limiting also make this system better suited to changing recording conditions than the Mini Mic Pro, whose supplied details emphasize plug-and-play compatibility and wind covers instead. Creators using compatible DJI devices can connect transmitters directly through OsmoAudio, although that convenience does not extend to every phone or camera setup. The 400 m maximum transmission range is the highest stated here, but it is a specification rather than a guarantee for every environment.We would choose this kit when flexibility for two speakers and fewer charging interruptions matter more than keeping the setup minimal. Its tradeoff is the extra receiver and case to carry, and creators outside the compatible DJI ecosystem should plan to use the included receiver. Strong noise cancellation may help in noisy settings, but it is not a substitute for choosing a suitable recording location.
Pros:
- Includes two transmitters, one receiver, and a charging case
- Up to 48 hours of battery life with the case
- Two noise-cancellation levels and automatic volume limiting
- Compatible DJI devices can connect directly through OsmoAudio
Cons:
- The receiver and charging case add gear to carry
- Direct connection without the receiver is limited to compatible DJI devices
- Strong noise cancellation may be needed in noisy environments
Best for: Creators who record interviews, livestreams, or two-person conversations and want a receiver, two transmitters, and charging case in one system.
Not ideal for: Solo creators who want the smallest possible phone setup or anyone who needs direct transmitter connection with a device outside the compatible DJI ecosystem.
Bottom line: We rank this first for its two-speaker flexibility, full receiver kit, and long stated battery life, provided the added gear fits our workflow.
“We rank this first for its two-speaker flexibility, full receiver kit, and long stated battery life, provided the added gear fits our workflow.”
Mini Mic Pro Wireless Lavalier Microphone for iPhone and Android
The Mini Mic Pro is the simplest fit for creators who want to clip on a small microphone and record across different devices without building a receiver-based kit. Its USB-C and Lightning adapters make it the most explicitly connector-flexible option here, covering a mix of newer and older phones as well as tablets and laptops. The product is described as plug-and-play, with no app or Bluetooth required, which keeps setup straightforward compared with the more elaborate two-transmitter DJI systems.It also comes with foam and furry wind covers, a useful inclusion for outdoor clips where wind can make speech harder to hear. Neither DJI kit lists wind covers in the supplied details, while both offer two noise-cancellation levels and automatic audio limiting. That makes the Mini Mic Pro appealing for a solo creator who values simple wind protection and connector choice; it is less equipped for interviews, since a two-transmitter setup is not specified.Battery life is the clearest compromise. At up to six hours per charge, it has less stated headroom than either DJI option, especially the charging-case system. We would favor it for short sessions and casual mobile recording, but creators working through a full production day should consider the longer-running DJI kits. It is also under one ounce, so carrying it is unlikely to be the deciding burden.
Pros:
- USB-C and Lightning adapters are included
- Works with iPhone, Android, tablets, and laptops
- Includes foam and furry wind protection
- Under one ounce and plug-and-play without an app or Bluetooth
Cons:
- Up to six hours per charge is the shortest stated battery life here
- The supplied details do not specify a two-transmitter setup
- No noise-cancellation levels or automatic volume limiting are listed
Best for: Solo creators who record short videos across USB-C and Lightning phones, tablets, or laptops and want a straightforward lavalier with wind covers.
Not ideal for: Creators who need two microphones for interviews or long sessions without a charging break.
Bottom line: We recommend it for uncomplicated solo recording across varied devices, as long as six-hour battery capacity suits the session.
“We recommend it for uncomplicated solo recording across varied devices, as long as six-hour battery capacity suits the session.”
DJI Mic Mini Wireless Microphone Kit (2 Transmitters, Mobile Receiver)
This kit keeps the two-person potential of the larger DJI system while centering the setup on a USB-C mobile receiver. It includes two 10 g transmitters, making it a natural match for interviews and paired creator content when we record on a compatible phone, PC, or tablet. The stated compatibility covers Android phones, PCs, tablets, and iPhone 15–17 series, giving it useful reach across common USB-C devices.Compared with the DJI system ranked first, this version lists a 300 m maximum range and up to 11.5 hours of operating time, rather than 400 m and up to 48 hours with the charging case. It still offers two noise-cancellation levels and automatic audio limiting, so creators retain some of the control features that distinguish the DJI options from the Mini Mic Pro. The mobile receiver may keep the device connection direct and compact, but this kit does not list the charging case included in the first DJI system.That makes it a focused choice for creators who prioritize a portable USB-C recording setup over the longest stated runtime. It is not waterproof, and its maximum range and operating time may vary with conditions. We would choose the charging-case system for long shoots or when its broader range is useful; this kit makes more sense when we want two transmitters and a mobile-oriented receiver with fewer listed accessories.
Pros:
- Includes two compact 10 g transmitters
- USB-C receiver supports listed iPhone, Android, PC, and tablet devices
- Offers Basic and Strong noise-cancellation levels
- Automatic audio limiting is included
Cons:
- Not waterproof
- Up to 11.5 hours is less than the charging-case system’s stated runtime
- Maximum range and operating time may vary by conditions
Best for: Creators who record two-person content on a compatible USB-C phone, PC, or tablet and want a compact mobile-receiver setup.
Not ideal for: Creators needing waterproof equipment, the longest stated battery life, or compatibility beyond the listed USB-C devices.
Bottom line: We would pick this focused kit for compact two-person USB-C recording, while choosing the other DJI system for more runtime and range.
“We would pick this focused kit for compact two-person USB-C recording, while choosing the other DJI system for more runtime and range.”
As an Amazon Associate we earn from qualifying purchases.
Before You Start
Charge everything first. Put the transmitters and receiver in their charging case or connect them to USB power and wait until all units show a full charge — usually 30 to 90 minutes. Recording with a half-charged transmitter is the fastest way to lose audio mid-shoot, because transmitter batteries drain faster than the receiver’s.
Identify your recording environment before you begin. Indoors with Wi-Fi routers, Bluetooth devices, and microwaves nearby, 2.4 GHz wireless systems can pick up interference. Outdoors, wind is your main enemy. Plan to work within roughly 50 meters (150 feet) of clear line of sight between transmitter and receiver; walls and bodies reduce range. Turn off unused Bluetooth devices (smartwatches, earbuds) on your person before recording.
Step-by-Step Instructions
Step 1: Charge all units fully
Place the transmitter(s) and receiver in the charging case, or connect them via USB-C to a power source. Watch for the charging indicator on each unit — typically a blinking or solid red light while charging and green or white when full.
Tip: Do not skip this step even if the units arrive partially charged. A full charge gives you 4–7 hours of recording time on most systems.
Check: All units show a full-charge indicator light and none blink or show low-battery warnings.
Step 2: Power on the transmitter and receiver
Press and hold the power button on each unit for 2–3 seconds until the displays or indicator lights turn on. Power on the receiver first, then the transmitter.
Tip: On most systems, the units pair automatically when powered on within a few meters of each other. If they do not, hold the pairing button on the receiver until it flashes, then do the same on the transmitter.
Check: Both units show a connected or linked status — usually a solid green light or an on-screen channel indicator matching between units.
Step 3: Connect the receiver to your recording device
Plug the receiver into your device using the correct output: mount it directly into the camera shoe or cold shoe and connect the 3.5mm cable to the camera’s mic input, or plug a USB-C/Lightning receiver directly into your phone. For a computer, connect via USB if your system supports it, or use an audio interface with a 3.5mm input.
Tip: Warning: camera mic inputs come in two types — mic level and line level. Plug into the jack marked with a microphone icon, not headphones. Plugging into the wrong jack produces distorted or silent audio.
Check: Your device recognizes an external microphone. On phones, a popup or icon usually appears; on cameras, the external mic indicator lights up in the audio menu.
Step 4: Attach and position the transmitter
Clip the transmitter to your subject’s clothing roughly 15–20 cm (6–8 inches) below the mouth — around the second shirt button or the center of the chest. If the transmitter has an external lavalier mic, clip the mic itself at this height and keep the body pack hidden in a pocket or waistband.
Tip: Position the mic capsule slightly off-center to reduce plosives (popping ‘p’ sounds), and check that clothing does not rub against the mic. Fabric rustle is one of the most common audio flaws in creator content.
Check: The transmitter sits securely, does not swing when the subject moves, and no fabric covers the mic opening.
Step 5: Set the input level on your recording device
Open the audio settings on your camera, phone app, or computer. Have the subject speak at their normal performance volume while you watch the level meter. Adjust the gain or input volume so speech peaks land around -12 dB to -6 dB on the meter, never touching 0 dB.
Tip: If your wireless system has its own gain control, set the device input to a mid-level value first, then fine-tune with the transmitter’s gain. Have the subject count loudly or laugh — real peak moments reveal clipping that calm test speech hides.
Check: Level meters move clearly with speech, peaking in the upper third of the meter without ever hitting the red zone.
Step 6: Attach the windscreen if recording outdoors
Slide the foam windscreen or fuzzy windjammer over the mic capsule before going outside. If wind is strong, also position the subject so their back faces the wind.
Tip: Skip the windscreen indoors — it slightly dulls high frequencies and is unnecessary without moving air.
Check: The windscreen fits snugly with no gap at the base where wind can enter.
Step 7: Run a 30-second test recording
Record 30 seconds of the subject speaking normally, including a few loud phrases. Then play the recording back through headphones and listen carefully. Check for clarity, consistent volume, background hum, static, or dropouts.
Tip: Watch the receiver during the test: if the signal indicator flickers or drops, move closer to the receiver or away from Wi-Fi routers and other electronics.
Check: Playback sounds clear and full, voice is prominent over any background, and you hear no dropouts, crackling, or distortion across the full 30 seconds.
Step 8: Record your content with a safety check
Begin your real recording. Confirm the transmitter and receiver are both still on and linked, hit record, and glance at the audio meters for the first 10 seconds. During long sessions, periodically check the receiver’s battery and signal indicators.
Tip: Many wireless systems record a backup audio file onto a microSD card in the transmitter. Enable this feature if available — it saves you if a wireless dropout hits during the best take.
Check: Meters move steadily throughout recording and both units stay powered with a stable link until you stop.
Step 9: Review, offload, and power down
After recording, play back a short section from the middle of your file, not just the beginning. Then transfer files to your computer or cloud storage. Power off the transmitter and receiver with a long press, and return them to the charging case.
Tip: Do not delete files from the recording device until you have confirmed they play correctly on your computer.
Check: Files open and play on your computer with audio intact, and all wireless units are back on charge for the next session.
Common Mistakes to Avoid
- Setting input levels too high, causing clipped, distorted audio that cannot be fixed in editing. — Always aim for peaks between -12 dB and -6 dB, and test with loud speech, not just a quiet sound check.
- Placing the transmitter too far from the mouth or burying it under clothing, producing muffled, distant-sounding voice. — Clip the mic 15–20 cm below the mouth, off-center, with nothing covering the capsule. Listen through headphones before recording.
- Recording with partially charged units and losing the transmitter battery mid-shoot. — Charge all units fully before every session and put them back in the case immediately after use.
- Using the wrong cable — a 3.5mm TRS cable designed for cameras plugged into a phone, or a headphone jack instead of a mic input. — Verify your device’s input type before the session and keep the correct cable or adapter labeled and stored with the mic kit.
Troubleshooting
Problem: No audio at all in the recording, even though the receiver is connected.
Solution: Check three things in order: confirm the receiver is fully plugged in and recognized by the device; confirm the device’s audio input is set to external mic rather than built-in mic; and confirm the transmitter is powered on and paired. Re-pair the units by powering both off, then on receiver-first.
Problem: Audio crackles, drops out, or intermittently cuts.
Solution: This is usually interference or range. Move closer to the receiver, keep a clear line of sight between units, turn off nearby Bluetooth devices and Wi-Fi routers, and change the channel in the system’s settings if the option exists. Recording a backup track on the transmitter’s microSD card protects you if drops continue.
Problem: Audio is very quiet even at maximum gain.
Solution: Check whether the system has a gain or output switch set to a low setting, and confirm you are using a mic-level cable into a mic input. Move the transmitter closer to the mouth. If the subject speaks softly, raise the transmitter’s internal gain first rather than the camera gain, which amplifies noise.
Problem: Loud wind noise ruins outdoor recordings.
Solution: Attach the foam or fuzzy windscreen, turn the subject so their back faces the wind, and stand behind a natural windbreak such as a wall or vehicle. If wind remains extreme, record indoors or re-record the affected lines later.
What Success Looks Like
Your setup is working correctly when all of the following are true: the transmitter and receiver show a stable linked status throughout a session; your test recording plays back with clear, prominent voice that peaks between -12 dB and -6 dB with no clipping; there are no dropouts, crackles, or hum in the full test file; and you can repeat the entire setup — power on, connect, level check, test clip — in under five minutes. If your test file sounds like a professional interview recording you would publish without hesitation, you have succeeded.
Next Steps
Build this sequence into a permanent pre-shoot checklist: charge, pair, connect, position, level check, 30-second test clip. Run it before every session and it becomes automatic.
From here, useful next tasks include: enabling the transmitter’s onboard backup recording if your system supports it; buying a second transmitter for two-person interviews and learning to balance both channels; experimenting with mic placement and clothing to reduce rustle; and adding a cheap pair of closed-back monitoring headphones to your kit so you always hear what the camera hears. If you plan to live stream, repeat this guide with your streaming software open, since apps like OBS and Streamlabs have their own input gain settings that override your device defaults.
Frequently Asked Questions
Do I need one transmitter or two?
One transmitter covers a single speaker — fine for solo vlogs and talking-head videos. Get a two-transmitter kit if you regularly interview people, record podcasts with a guest, or film two presenters. Most dual systems record each person on a separate stereo channel, letting you fix levels independently in editing.
What is the realistic wireless range I can expect?
Most consumer 2.4 GHz systems claim 100–200 meters, but real-world range is much shorter. Indoors, expect a reliable 15–30 meters through walls; outdoors with clear line of sight, 50 meters is typical. Bodies, walls, and interference all cut range, so keep the receiver in line of sight of the transmitter whenever possible.
Should I record audio into the camera or separately on the transmitter?
Record into the camera as your primary workflow — it keeps audio and video in sync automatically. If your system supports onboard microSD recording, enable it as a backup. Separate files require manual syncing in editing, which you only want to do when the wireless link fails.
Can I use a wireless mic while live streaming?
Yes. Connect the receiver to your computer via USB or an audio interface, then select it as the input device in your streaming software. Remember that the app’s own gain slider affects your final levels, so re-check the meter inside OBS or your streaming platform after connecting.
Why does my audio sound fine on the device but bad after uploading?
Video platforms apply additional compression that exposes flaws like background hiss and low levels. Record slightly hotter and cleaner than sounds necessary — peaks near -6 dB, minimal room noise — and review an exported test upload before publishing a full video. What sounds acceptable in headphones during recording often needs more headroom after platform compression.
Halloween Picks
halloween
As an affiliate, we earn on qualifying purchases.