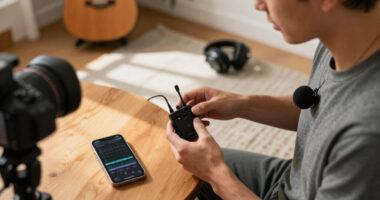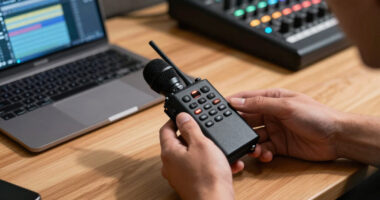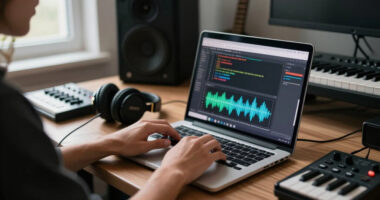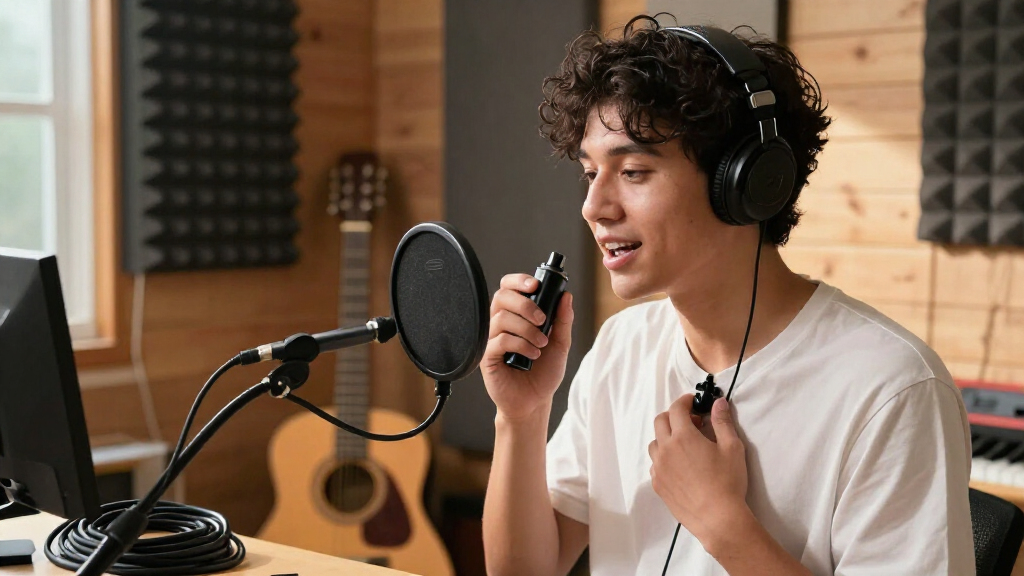
Set up a wireless microphone and record clear voice audio for videos, livestreams, or interviews. This guide is for creators who are new to wireless audio and want to connect a microphone to a camera, phone, or computer. Allow about 20-40 minutes, including a short recording test. You will finish with a working connection, a suitable mic placement, and a recording you can check before filming.

Get audio and creator gear delivered free with Prime
- Fast, free delivery on millions of items
- Prime Video, Amazon Music and more included
- Member-only deals all year

DJI Mic Mini Wireless Microphone Kit with 2 Transmitters, 1 Receiver, and Charging Case
- ✔ Transmitters: 2
- ✔ Receiver: 1
- ✔ Transmitter weight: 10 g each

Mini Mic Pro Wireless Lavalier Microphone for iPhone and Android
- ✔ Microphone form factor: Mini lavalier
- ✔ Microphones included: 2
- ✔ Connectors: Lightning and USB Type-C

DJI Mic Mini Wireless Microphone Kit (2 Transmitters, Mobile Receiver)
- ✔ Transmitters: 2
- ✔ Receiver: Mobile receiver
- ✔ Transmitter weight: 10 g each
Difficulty: Beginner | Time: 20-40 minutes
What You’ll Need
Tools & Materials:
- Wireless microphone system with a transmitter and receiver, or a compatible all-in-one wireless mic
- Camera, phone, or computer you plan to record with
- The correct audio cable or phone adapter for that device
- Charged batteries or charging case
- Headphones for listening to a test recording
Knowledge:
- Basic ability to connect an accessory to your recording device
- Basic familiarity with starting and stopping an audio or video recording
Check the microphone system’s compatibility list and connector types before setup. USB-C, Lightning, 3.5 mm, and camera inputs are not interchangeable without the right cable or adapter. Charge both units and download any required app or firmware before recording. If the system has a built-in recorder, learn how to start it and retrieve its files.
DJI Mic Mini Wireless Microphone Kit with 2 Transmitters, 1 Receiver, and Charging Case
This kit earns the top spot because it combines the creator essentials that are hardest to add later: two transmitters, a receiver, and a charging case. That makes it a natural fit for interviews, co-hosted videos, and shoots where stopping to recharge would disrupt the workflow. Its stated up to 48 hours with the case is the biggest battery figure in this lineup, though actual operating time will depend on use.Compared with the other DJI kit, this version lists a 400 m maximum transmission range and includes the case, making it the more flexible choice for creators moving between setups. Both DJI options offer Basic and Strong noise cancellation and automatic audio limiting, useful when a recording environment changes or a speaker gets louder than expected. Mini Mic Pro is easier to align with both Lightning and USB-C phones, however, and includes foam and dead cat tips. The DJI kit also has a compatibility caveat: use with Osmo Mobile series products requires the first-generation DJI OM Multifunctional Module. It is not waterproof, and its stated range should not be mistaken for a guarantee in every environment.
Pros:
- Two transmitters support two-person recording
- Charging case provides up to 48 hours of stated battery life
- Basic and Strong noise cancellation options
- Automatic limiting helps reduce clipping
Cons:
- Not waterproof
- Osmo Mobile series use requires a specific first-generation module
- Device compatibility varies across Bluetooth, USB-C, and DJI OsmoAudio connections
Best for: Creators who regularly record interviews, co-hosted videos, or longer sessions and want two transmitters with a charging case.
Not ideal for: Creators who need a clearly stated Lightning receiver option, waterproof equipment, or the simplest direct phone setup.
Bottom line: For creators who value two-person flexibility and long sessions, this is the most complete kit in the comparison.
“For creators who value two-person flexibility and long sessions, this is the most complete kit in the comparison.”
Mini Mic Pro Wireless Lavalier Microphone for iPhone and Android
Mini Mic Pro is the straightforward pick for creators who want to clip on a lavalier and start recording without an app or Bluetooth setup. Its included Lightning and USB-C adapters make it the most convenient option here for switching between compatible iPhones and Android phones. The kit includes two lavalier microphones, so it can cover more than one speaker, though its details do not describe the receiver and operating workflow as fully as the DJI kits do.Where the DJI models add two levels of noise cancellation and automatic audio limiting, Mini Mic Pro leans on simplicity and included foam and dead cat wind protection. Those accessories can help when recording outdoors, but the omnidirectional pickup may also capture voices and ambience from around the wearer. Its stated battery life is up to six hours per charge, shorter than the DJI options’ stated overall operating provisions. The charging pass-through is useful when a phone battery is the limiting factor, but it does not change the microphone’s own runtime. This is a sensible choice for phone-first creators who value adapter flexibility over more advanced sound controls.
Pros:
- Includes USB-C and Lightning adapters for compatible devices
- Connects without an app or Bluetooth setup
- Foam and dead cat wind protection are included
- Phone can charge while the microphone is in use
Cons:
- Up to six hours per charge is the shortest stated battery life here
- Omnidirectional pickup can capture surrounding sound
- Warranty details provided are incomplete
Best for: Phone-first creators who move between compatible Lightning and USB-C devices and want a plug-and-play lavalier kit.
Not ideal for: Creators filming long sessions, needing adjustable noise cancellation, or seeking directional isolation in busy environments.
Bottom line: Choose Mini Mic Pro when broad phone compatibility and a low-friction setup matter more than extended runtime or adjustable noise control.
“Choose Mini Mic Pro when broad phone compatibility and a low-friction setup matter more than extended runtime or adjustable noise control.”
DJI Mic Mini Wireless Microphone Kit (2 Transmitters, Mobile Receiver)
This configuration keeps the useful parts of the DJI approach—two 10 g transmitters, noise cancellation, and automatic limiting—in a kit built around a mobile receiver. Its stated 11.5 hours of operating time covers a substantial recording window, while direct connection to compatible phones, computers, and tablets via USB-C makes it appealing for creators who keep their setup mobile. The stated 300 m range is generous on paper, although it is shorter than the 400 m listed for the charging-case kit.Compared with that first-ranked DJI kit, this one is the more focused choice if the creator already records through USB-C devices and wants a small receiver setup. It does not list the charging case that supports the other kit’s up to 48-hour figure, so it is less suited to extended multi-session use. Compared with Mini Mic Pro, it adds two noise cancellation levels and automatic limiting, but it does not offer the same clearly stated pair of Lightning and USB-C adapters. The microphones are omnidirectional, and the kit is not waterproof. For Osmo Mobile series use, the same first-generation DJI OM Multifunctional Module requirement applies.
Pros:
- Two 10 g transmitters are lightweight
- Basic and Strong noise cancellation levels
- Automatic limiting helps prevent audio clipping
- USB-C mobile receiver works with compatible phones, computers, and tablets
Cons:
- No charging case is listed in the provided kit description
- Maximum listed range is shorter than the charging-case DJI kit
- Not waterproof and Osmo Mobile use has a module requirement
Best for: USB-C focused creators who want two lightweight transmitters for interviews, livestreams, or mobile video.
Not ideal for: Creators who use Lightning phones, need a charging case for long shoots, or record in wet conditions.
Bottom line: This is a compact choice for USB-C workflows, provided its receiver fit and operating-time limits match the shoot.
“This is a compact choice for USB-C workflows, provided its receiver fit and operating-time limits match the shoot.”
As an Amazon Associate we earn from qualifying purchases.
Before You Start
Choose a quiet room for the first test. Keep the transmitter and receiver close together, and avoid placing either behind a metal object or inside a bag. Wireless systems use different frequency bands and connection methods; follow the manufacturer’s pairing instructions for your model. In a public venue, local rules may limit which radio frequencies you can use, so check the system documentation and venue guidance.
Do not assume the receiver is recording audio just because its lights are on. The recording device must also be set to use the connected microphone. Keep a backup option available, such as your device’s built-in microphone, until you have listened to a test clip.
Step-by-Step Instructions
Step 1: Choose the right connection for your device
Check the input on the device you will record with, then match it to the receiver output. For a camera with a 3.5 mm microphone input, use the cable specified for camera use. For a phone, use a compatible USB-C or Lightning receiver, or the correct adapter and cable. For a computer, connect by USB or use the audio input supported by your system. Read the microphone manual if the cable has separate camera and phone versions; a plug that fits may still use the wrong wiring.
Tip:Some phones disable their built-in microphone only when a compatible digital receiver is connected. Confirm the phone recognizes the accessory in the recording app.
Check: The receiver can connect to your device using the specified cable or adapter, and the device shows the microphone as an available input.
Step 2: Charge and pair the microphone units
Charge the transmitter and receiver, then turn both on. Follow the system’s pairing instructions; some sets pair automatically, while others require you to press a link button or select a channel. Wait for the connected status indicator before attaching the transmitter. If the system offers a separate recording mode, check whether it needs to be activated manually.
Tip:Charge the units before a long shoot, even if the battery indicator shows some power. Battery estimates can vary with transmission range and recording features.
Check: The transmitter and receiver show a stable connection, and neither unit displays a low-battery warning.
Step 3: Connect the receiver and select it as the audio input
Connect the receiver to the camera, phone, or computer with the matching cable or adapter. Open the recording app or device audio settings and select the external microphone when an input choice is available. On a camera, find the audio input or external microphone setting. On a phone, make a short test recording in the app you intend to use. On a computer, select the receiver in the system sound settings and again in your recording or streaming software if it has its own input menu.
Tip:Some cameras use a plug-in power setting for microphones. Follow the receiver’s instructions before changing this setting; the wrong power option may cause noise or prevent the expected connection.
Check: Speaking near the transmitter moves the input meter, or the device’s audio monitor responds, while the microphone is connected.
Step 4: Attach and position the transmitter
Clip the transmitter securely to clothing or attach its lavalier microphone near the upper chest, about 15-20 cm below the mouth. Keep the microphone opening uncovered and point it toward your voice. Route any cable so it does not rub against fabric, and tuck away loose cable without pulling on the mic. If you are using a handheld or magnetic system, position it as its manufacturer recommends and keep it clear of jewelry or objects that can rattle.
Tip:Do not clip a mic directly under a thick collar, scarf, or necklace. Fabric brushing the microphone can sound louder than speech.
Check: The microphone stays in place when you turn your head, and its opening is clear of clothing and hair.
Step 5: Set a safe recording level
Speak at the volume and distance you expect to use during the recording. Watch the receiver and recording-device meters, then adjust input gain so normal speech is strong and loud words do not reach the clipping or red zone. If your system has automatic gain, noise reduction, or a safety track, begin with the manufacturer’s recommended settings and note any changes. Keep the transmitter’s own gain and the camera or app input level in mind; changing one may affect the final level.
Tip:Do not raise the level until the meter is always near its maximum. A loud laugh or emphasized word can distort even when ordinary speech looks quiet.
Check: Normal speech registers clearly on the meter, and your loudest test phrase stays below the clipping indicator.
Step 6: Check for interference and unwanted noise
Record a short clip while standing where you plan to film. Listen for dropouts, buzzing, hiss, clothing rustle, wind, and room echo. If the system supports channel scanning, run it and select a clear channel according to its instructions. Move the receiver into clear view of the transmitter when possible, and keep both away from Wi-Fi routers, large electronics, and crowded radio equipment. Add the supplied windscreen outdoors, and reduce nearby noise sources before recording.
Tip:Test from the farthest position you will use. A connection that works at arm’s length may drop when you move across a room or turn your body.
Check: The test clip plays without audible dropouts, distracting rubbing, or distortion at the intended distance.
Step 7: Record and review a complete test
Record 20-30 seconds using the same app, camera settings, mic placement, and speaking volume planned for the shoot. Include a normal sentence, a louder phrase, and a brief pause. Play the clip back through headphones. Confirm that your voice is clear, centered as expected, and at a steady level, and that the recording contains no unexpected silence or loud handling noise. If the microphone has internal recording, check its status indicator and make sure you know how to transfer the backup file.
Tip:Listen on headphones rather than relying only on a screen meter. A meter can show a signal while the recording still contains wind or fabric noise.
Check: You can hear the full test clearly from start to finish, with no clipping, dropouts, or missing audio channel.
Common Mistakes to Avoid
- Using a cable or adapter that fits but is not wired for the device or receiver. — Match the cable to the exact receiver output and recording-device input listed in the manuals, then verify the input with a test recording.
- Placing the microphone under clothing or where fabric rubs against it. — Keep the mic opening exposed, secure the cable, and record a short movement test before filming.
- Setting input gain too high to make the meter look full. — Set the level using both normal and loud speech, leaving room below the clipping indicator.
- Starting a shoot without checking whether the recording app selected the external mic. — Check the input meter and listen to a playback clip in the exact app or camera setup you plan to use.
Troubleshooting
Problem: The recording has no sound or uses the device’s built-in microphone.
Solution: Reconnect the receiver, check that it is powered and paired, and select it in the device and app input settings. Confirm that the cable or adapter supports microphone input, then record and play back another short clip.
Problem: Audio cuts out when you move.
Solution: Bring the receiver closer, move it into open view, and reduce obstacles between the units. Check battery levels and try a clearer channel if your system provides channel scanning.
Problem: Speech sounds distorted or harsh.
Solution: Lower the transmitter or recording-device input gain, then test again using your loudest expected speaking voice. Check that any automatic level feature is not raising background noise between phrases.
Problem: The voice is muffled or has rustling and wind noise.
Solution: Move the microphone away from collars and hair, uncover its opening, and secure the cable. Outdoors, fit the supplied windscreen and turn away from strong wind; indoors, reduce nearby fans or other noise.
What Success Looks Like
Your setup is ready when the receiver stays paired, the recording device selects it as the input, and a test clip captures clear speech at normal and loud speaking levels. Playback should have no clipping, unexpected silence, distracting fabric or wind noise, or wireless dropouts at the distance you plan to use. Check the system’s battery before the shoot and confirm any internal backup recording is active if you rely on it.
Next Steps
Before each shoot, charge the units, check the connection and recording input, and make a brief playback test. Keep the microphone and receiver protected during storage, clean the mic opening as directed by the manufacturer, and save internal recordings before formatting or clearing a device. For interviews, test each transmitter and channel separately; for outdoor work, repeat the wind and distance checks at the location.
Frequently Asked Questions
Can I connect a wireless microphone to any phone?
No. The phone, receiver, cable, and adapter must support the same connector and audio input standard. Check the microphone maker’s compatibility information and make a test recording in your intended app before filming.
How far can I stand from the receiver?
Range depends on the system, obstacles, interference, and how the units are positioned. Use the range stated by the manufacturer as a guide, then test from your actual filming position. Walls and a body between the transmitter and receiver can reduce the usable distance.
Should I record a backup on the transmitter?
Use internal transmitter recording when your system supports it and the recording matters. Check that recording has started, confirm storage space and battery, and learn how to transfer the file. A backup helps if the wireless signal drops, but it does not replace checking the main recording.
Do I need a windscreen indoors?
Usually not in a still, quiet room. Use the supplied windscreen outdoors or near fans, vents, or other moving air. Listen to a test clip, since some windscreens can soften high frequencies when there is no wind.